Installation
Table of contents
- Adding the tracking code
- Tracking non-standard fields
- Tracking custom attributes
- Tracking traffic medium attributes
- Tracking custom events
- Allowing Zuko tracking in a Content Security Policy (CSP)
- Checking your installation
Adding the tracking code
Ways to add the code to the page
The code you use to install Zuko will be specific to each form on your site. It’s imperative that each piece of installation code is loaded for the correct form.
Depending on your site, you can choose to install Zuko using a tag manager like Google Tag Manager or insert the code into the HTML.
See the examples section below for examples of the tags that you’ll need to add.
Google Tag Manager
To add the Zuko tags via Google Tag Manager, you’ll first need to create at least the tags from the examples section in Google Tag Manager.
The Form tracking code tags can usually be fired in GTM using the built-in Dom ready trigger, as this is the easiest solution for most users.
If your form is not visible on page load and visitors are required to click a button to open up the form, the form view event will need to be triggered by a custom trigger in GTM.
Directly in the source code
To add Zuko tags directly into the source of your site, your development team will need to add at least the tags from the examples section.
Where on your site these tags will need to be added is specific to each site, but usually the the Form tracking code can be added to the page after your form, before the closing </body> tag.
If your form is not visible on page load and visitors are required to click a button to open up the form, the form view event will need to be executed on the page after the form has been made visible.
Examples
Form tracking tag
Your form may look like this:
<form id="mailing-list-signup">
  <label for="email">Email: </label>
  <input id="email" type="email" />

  <input type="submit">
</form>
When the form is visible on page load
To track this form, ensure that a tag like the following is configured to load in GTM or be added to the page when the page loads:
<script src="https://assets.zuko.io/js/v2/client.min.js"></script>
<script>
  Zuko
    .trackForm({
      target: document.getElementById('mailing-list-signup'),
      slug: 'caba1457c8fa6b78'
    })
    .trackEvent(Zuko.FORM_VIEW_EVENT)
</script>
This tag loads the Zuko library onto the page, starts tracking the form ready for interaction events from the visitor, then sends the form view event.
In Zuko.trackForm(), you will need to change the example for your form:
targetis the element on the page which represents your form. Read more on form elements here.slugis a string of text used to identify your form within your domain. Read more on slugs here.
Note: If you have a multi-step form, the target must be an element which does not change throughout the steps. For example an outer container div.
When the form is not visible on page load
If your form is in the HTML but is hidden from visitors on page load and then shown when they click a button, you will need to delay firing the form view event until your form is visible.
Instead of the above tag, you can use two separate tags:
<script src="https://assets.zuko.io/js/v2/client.min.js"></script>
<script>
  Zuko
    .trackForm({
      target: document.getElementById('mailing-list-signup'),
      slug: 'caba1457c8fa6b78'
    })
</script>
This tag loads the Zuko library onto the page and starts tracking the form ready for interaction events from the visitor.
Then add this tag when the form is made visible to the visitor:
<script>
  Zuko
    .trackForm({slug: 'caba1457c8fa6b78'})
    .trackEvent(Zuko.FORM_VIEW_EVENT)
</script>
This tag uses the Zuko library that is already loaded onto the page, then sends the form view event.
In Zuko.trackForm(), the slug is used to identify which form that the visitor has viewed.
Note: The target is not necessary when sending the form view event as no interactions are to be tracked.
Completion tracking tag
A completion event can be fired on a certain URL, page load, or triggered on an event, as long as it accurately represents the point that a visitor has completed your form.
Following on from the above examples, ensure that a tag like the following is configured to fire in GTM or be added to the page when a visitor has completed your form.
<script src="https://assets.zuko.io/js/v2/client.min.js"></script>
<script>
  Zuko
    .trackForm({slug: 'caba1457c8fa6b78'})
    .trackEvent(Zuko.COMPLETION_EVENT)
</script>
Note: The target is not necessary when sending the completion event as no interactions are to be tracked.
This tag loads the Zuko library onto the page, then sends the completion event. The slug is used to identify which form that the visitor has completed.
You only need to bring in the Zuko library if your Completion tracking tag is fired on a different page to the Form tracking code tags.
Advanced tracking
Form with no name or id attributes
A form with no name or id HTML attributes can be tracked by Zuko, provided that you have a reliable way to target the form element on the page.
For example, your form may have a HTML class of checkoutForm:
<form class="checkoutForm">
  <label for="email">Email: </label>
  <input id="email" type="email" />

  <input type="submit">
</form>
You could use the following code to track the form when visible on page load, assuming that there are no other elements on the page which have this class:
<script src="https://assets.zuko.io/js/v2/client.min.js"></script>
<script>
  Zuko
    .trackForm({
      target: document.getElementsByClassName('checkoutForm')[0], // Here we assume the first element with the class of checkoutForm is the form
      slug: 'checkoutForm'
    })
    .trackEvent(Zuko.FORM_VIEW_EVENT)
</script>
Note: Multiple elements on the page may have the same class, so this isn’t a reliable way of targeting a form.
Alternatively, when the surrounding elements are specific to your form:
<div class="container">
  <div class="mainContent">
    <form class="signup">
      <label for="email">Email: </label>
      <input id="email" type="email" />

      <input type="submit">
    </form>
  </div>
</div>
A CSS selector can be used to target a particular element:
<script src="https://assets.zuko.io/js/v2/client.min.js"></script>
<script>
  Zuko
    .trackForm({
      target: document.querySelector('.container .mainContent form.signup'), // A signup form inside the mainContent container
      slug: 'checkoutForm'
    })
    .trackEvent(Zuko.FORM_VIEW_EVENT)
</script>
Form that’s a <div> tag and not a <form>
If your form isn’t a standard <form> element, Zuko can still track the form, just as if it’s a form with no name or id attributes.
Forms added to the page after page load (e.g. AJAX)
For forms which are loaded in after the page has loaded, for example a form which is added to the page after an AJAX request has succeeded, you will need to ensure you execute the Zuko.trackForm() and trackEvent(Zuko.FORM_VIEW_EVENT) functions when you determine that your target element has been loaded.
Please see our browser JavaScript library documentation for specific guidance on the Zuko.trackForm() and trackEvent(Zuko.FORM_VIEW_EVENT) functions.
Tracking non-standard fields
- Changing the identity of a field by overriding it’s HTML attributes
- Tracking fields that are not a supported element
- Tracking Select2 fields
Changing the identity of a field by overriding it’s HTML attributes
Zuko uses a field’s tagName, type, name and id HTML attributes to create an identity for a field. It combines these four pieces of information into one identifier. If one of these attributes changes, Zuko will see it as a different field.
Sometimes, you may want to control the identity of a field. For example, you may want to show a number input to mobile visitors and a normal text field to desktop visitors:
<input type="number" name="zipCode">
<input type="text" name="zipCode">
In the above example, Zuko would track interactions with two separate ZIP code fields, depending on which version is rendered to your visitor by your site.
With a little tweak to the form in the HTML, Zuko allows interactions on the two fields to be tracked as one:
<input type="number" name="zipCode" data-zuko-type="number">
<input type="text" name="zipCode" data-zuko-type="number">
The data-zuko-type attribute instructs Zuko to override the tracked type attribute to have a value of number, meaning that interactions with both versions of the field are processed by Zuko as the visitor interacting with one field:
<input type="number" name="zipCode">
Zuko allows all four of the identifying HTML attributes (tagName, type, name and id) to be overridden in the same way:
<input data-zuko-tag-name="button">
<input data-zuko-type="number">
<input data-zuko-name="email">
<input data-zuko-id="email">
Tracking fields that are not a supported element
Sometimes, you may want to track your visitors interacting with an element that is not supported by Zuko out of the box.
For example, you may have a <div> that’s rendered as a button:
<div class="button">
Using the same method as overriding the identity of a field, you can override the tagName that Zuko uses in identifying this element, so that interactions with it can be tracked as if it was with a supported element:
<div data-zuko-tag-name="button" data-zuko-name="submitButton" class="button">
Zuko would track clicks on this element as clicks on a button that looks like this:
<button name="submitButton" class="button">
Tracking Select2 fields
Select2 is a jQuery plugin for select boxes. If your form uses Select2 select boxes you can use the following code to track change events when a visitor selects or deselects an option.
<script src="https://ajax.googleapis.com/ajax/libs/jquery/3.6.0/jquery.min.js"></script>
<script src="https://assets.zuko.io/js/v2/client.min.js"></script>
<script>
$(document).ready(function(){try{$('select').each(function(i,select){
  var $select=$(select);if($select.hasClass('select2-hidden-accessible')){$select.on('change',function(event){var element=event.target;if(element instanceof HTMLElement){
  Zuko.trackForm({slug:'INSERT_YOUR_SLUG_HERE'}).trackEvent({type:event.type,target:element});
}});}});}catch(e){}});
</script>
Choosing to not track fields
You may wish to completely ignore some fields, and avoid them being tracked. This can happen when, for example, a field programatically issues events.
Apply the data-zuko-tag-name override:
<input data-zuko-tag-name="DO-NOT-TRACK">
Tracking custom attributes
A custom attribute can be set on a visitor’s session to allow you to group your sessions into segments.
A custom attribute consists of two strings which represent a key-value relationship. For example, key: page_variant, value: a.
Custom attribute values are not intended to be completely unique, they should represent a group of visitors.
An attribute’s value may be set and re-set multiple times within a session. However, only the last value of the attribute only will be stored against the session.
Note: Both the key and value are limited to 85 characters long.
Note: If an invalid attribute is added to tracking, it will not be accepted. You can check your installation to verify why the attribute has not been accepted.
Available at the start of tracking
Custom attributes may be present for the visitor’s session when form tracking starts. In which case you can chain the setAttribute() function onto the Zuko.trackForm() function, before the form view event is sent.
<script src="https://assets.zuko.io/js/v2/client.min.js"></script>
<script>
  Zuko
    .trackForm({
      target: document.getElementById('mailing-list-signup'),
      slug: 'caba1457c8fa6b78'
    })
    .setAttribute('page_variant', 'a')
    .trackEvent(Zuko.FORM_VIEW_EVENT)
</script>
Available during tracking
Custom attributes may also become available during the visitor’s session depending on what the visitor selects in the form or depending on other factors that change during a session. In this case an instance of Zuko tracking needs to be assigned to a variable to be used for assigning attributes later.
In this example the selected value of the houseSelect field is set for the visitor’s session.
<script src="https://assets.zuko.io/js/v2/client.min.js"></script>
<script>
  window.zukoTrackingInst = Zuko
    .trackForm({
      target: document.getElementById('mailing-list-signup'),
      slug: 'caba1457c8fa6b78'
    })
    .trackEvent(Zuko.FORM_VIEW_EVENT)

  // Setting the houseType attribute when a visitor changes the field
  document
    .getElementById('houseSelect')
    .addEventListener('change', function (e) {
      window.zukoTrackingInst
        .setAttribute('houseType', e.target.value)
    })
</script>
Available at any time
Custom attributes may be available at any time whilst the visitor is on your form page. In this case, they can be added to a custom object on the window that Zuko can pick up and add to the visitor’s session.
For example, an attribute value may only be available on page view, before form tracking can start. Or you may wish to simply pass an attribute to Zuko without having to handle a form tracking instance.
This method is particularly useful when adding attributes from an external tool, such as campaign or A/B testing tool. You can incorporate the below snippet in your tool’s JavaScript code.
Attributes must be added to window.zuko.attributes, and be represented in a object format. The example below adds a custom attribute with a key page_variant, and the value is available in a variable pageVariantID.
<script>
  window.zuko = window.zuko || {};
  window.zuko.attributes = window.zuko.attributes || {};
  window.zuko.attributes.page_variant = pageVariantID;
</script>
Tracking traffic medium attributes
Zuko can track the medium by which a visitor arrived on your website and attribute it to their session.
Similar to how Google Analytics assigns a medium to page traffic, Zuko can assign the trafficMedium to your form tracking.
If you have already setup any utm_medium codes, Zuko will pick this up. Otherwise, Zuko will evaluate if the traffic medium is organic, referral, or none.
To enable this, you simply add this code to all pages on your website.
<script src="https://assets.zuko.io/js/v2/client.min.js"></script>
<script>Zuko.trackMedium()</script>
Tracking custom events
A custom event represents a specific type of event that your visitor encountered during their session on your form.
A custom event consists of an object with a type property, which is a simple short string describing the event.
It is recommended to keep the custom event type relatively short (40-50 characters), to make them easy to identify in visualisations in the Zuko app. For example, type: Email field invalid.
The trackEvent() function should be called at the point at which the event occurs.
Here form tracking is started and the form view event is sent:
<script src="https://assets.zuko.io/js/v2/client.min.js"></script>
<script>
  Zuko
    .trackForm({
      target: document.getElementById('mailing-list-signup'),
      slug: 'caba1457c8fa6b78'
    })
    .trackEvent(Zuko.FORM_VIEW_EVENT)
</script>
Then, when your validation detects a field is invalid, the custom event can be fired:
<script>
  // After the field has been interacted with
  if (!emailField.valid()) {
    Zuko
      .trackForm({slug: 'caba1457c8fa6b78'})
      .trackEvent({type: 'Error: email field is invalid'})
  }
</script>
Allowing Zuko tracking in a Content Security Policy (CSP)
Your site may have a Content Security Policy (CSP) in place, which controls the resources that can be loaded on to your site.
If you have such a policy in place, the following changes will need to be made to the policy to allow Zuko to track your form:
... script-src https://*.zuko.io; connect-src https://*.zuko.io https://b9r8u7pkx0.execute-api.eu-west-1.amazonaws.com https://zuko-session-replay-recordings-prod.s3.amazonaws.com; frame-src https://*.zuko.io;
Note that the above is not a replacement for your CSP; you will need to make sure to combine the directives above with those already in your policy.
For example, you may already have a CSP similar to below:
Content-Security-Policy: default-src 'self';
Given the above CSP, the new version of the policy – which allows Zuko tracking – would be:
Content-Security-Policy: default-src 'self'; script-src 'self' https://*.zuko.io; connect-src https://*.zuko.io https://b9r8u7pkx0.execute-api.eu-west-1.amazonaws.com https://zuko-session-replay-recordings-prod.s3.amazonaws.com; frame-src https://*.zuko.io;
Checking your installation
Once your installation is complete you can view events being sent to Zuko in the network tab of your browser
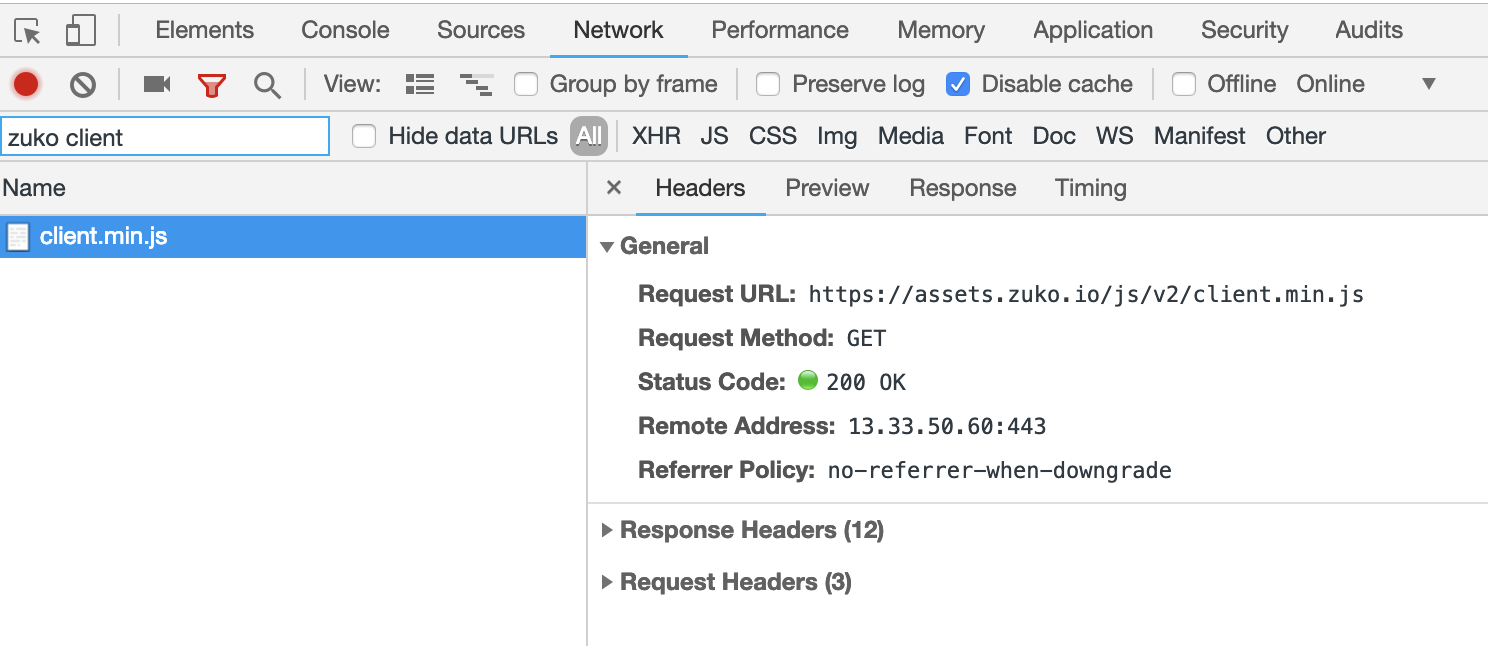
Here the Zuko JavaScript library had successfully loaded on the form page:
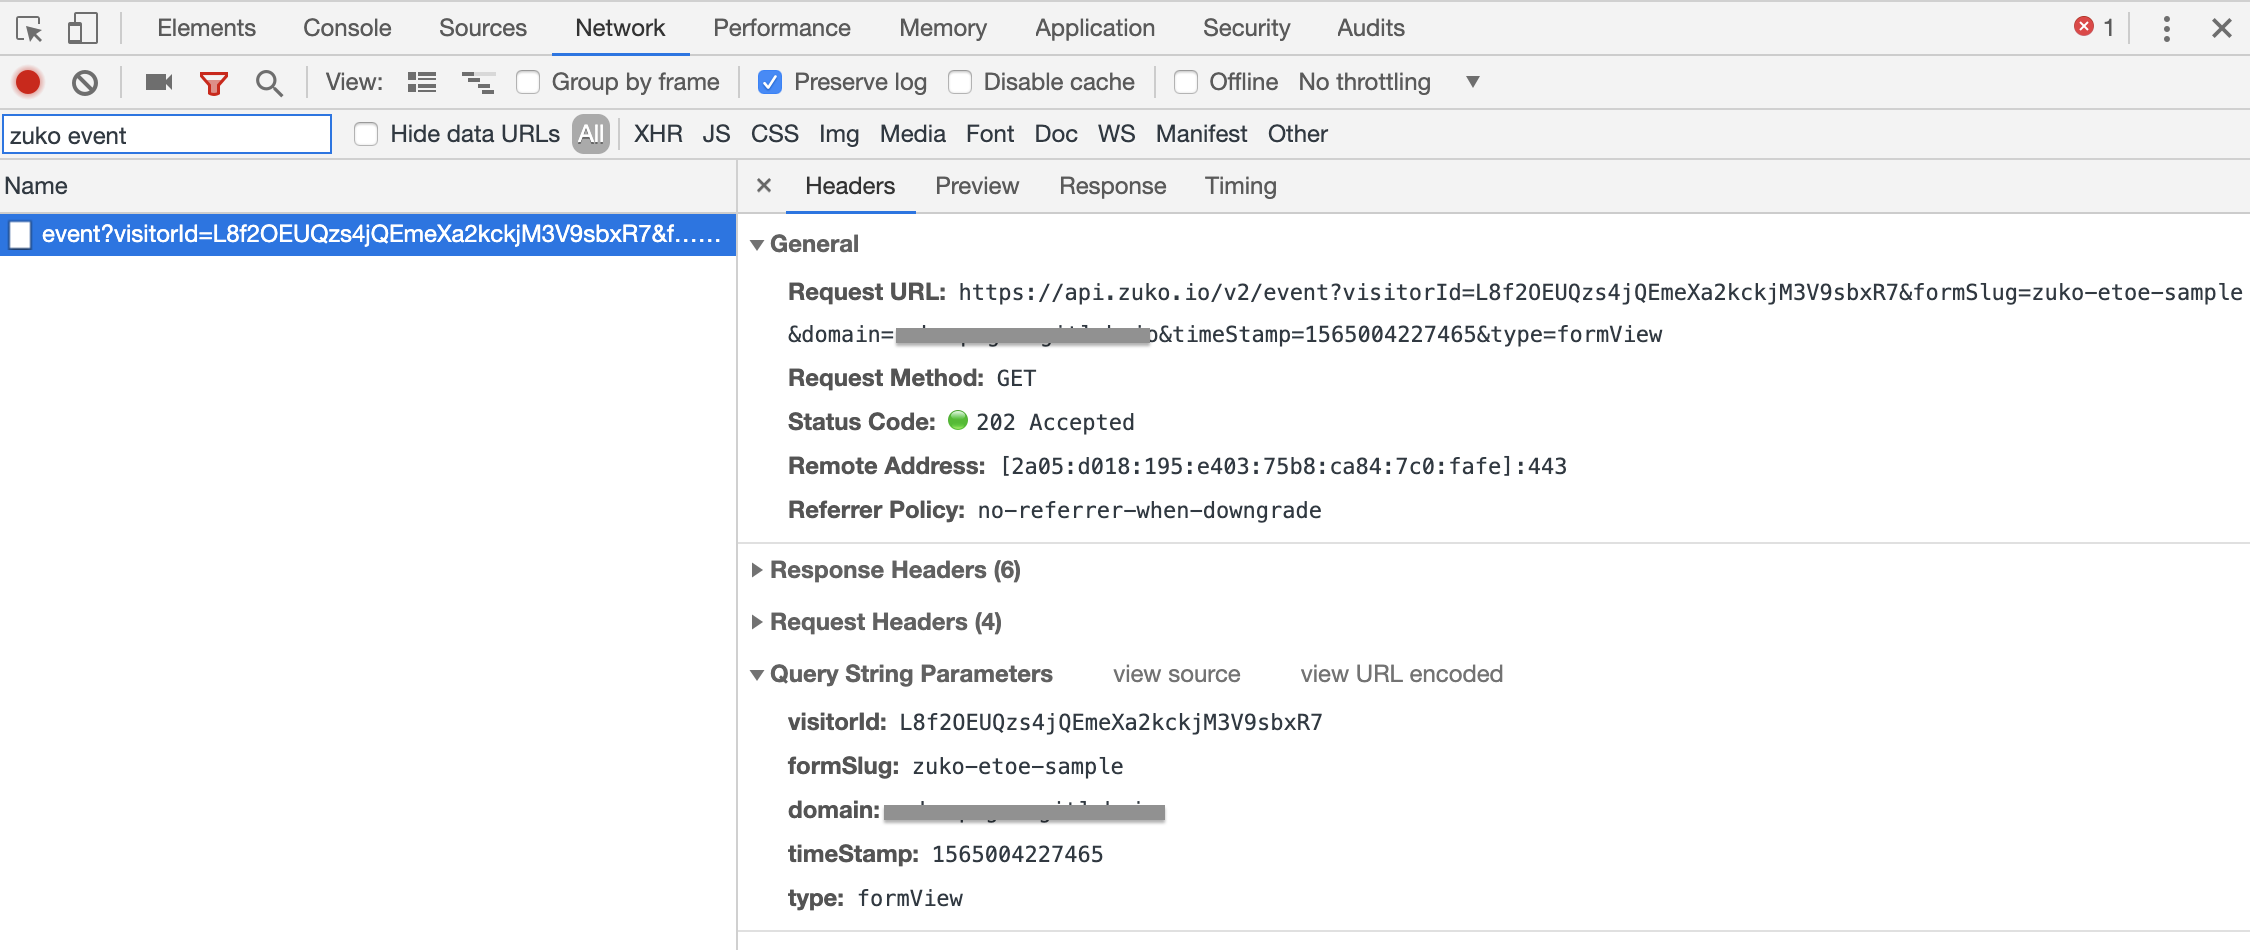
A form view event is sent to Zuko:
An interaction event is sent to Zuko:

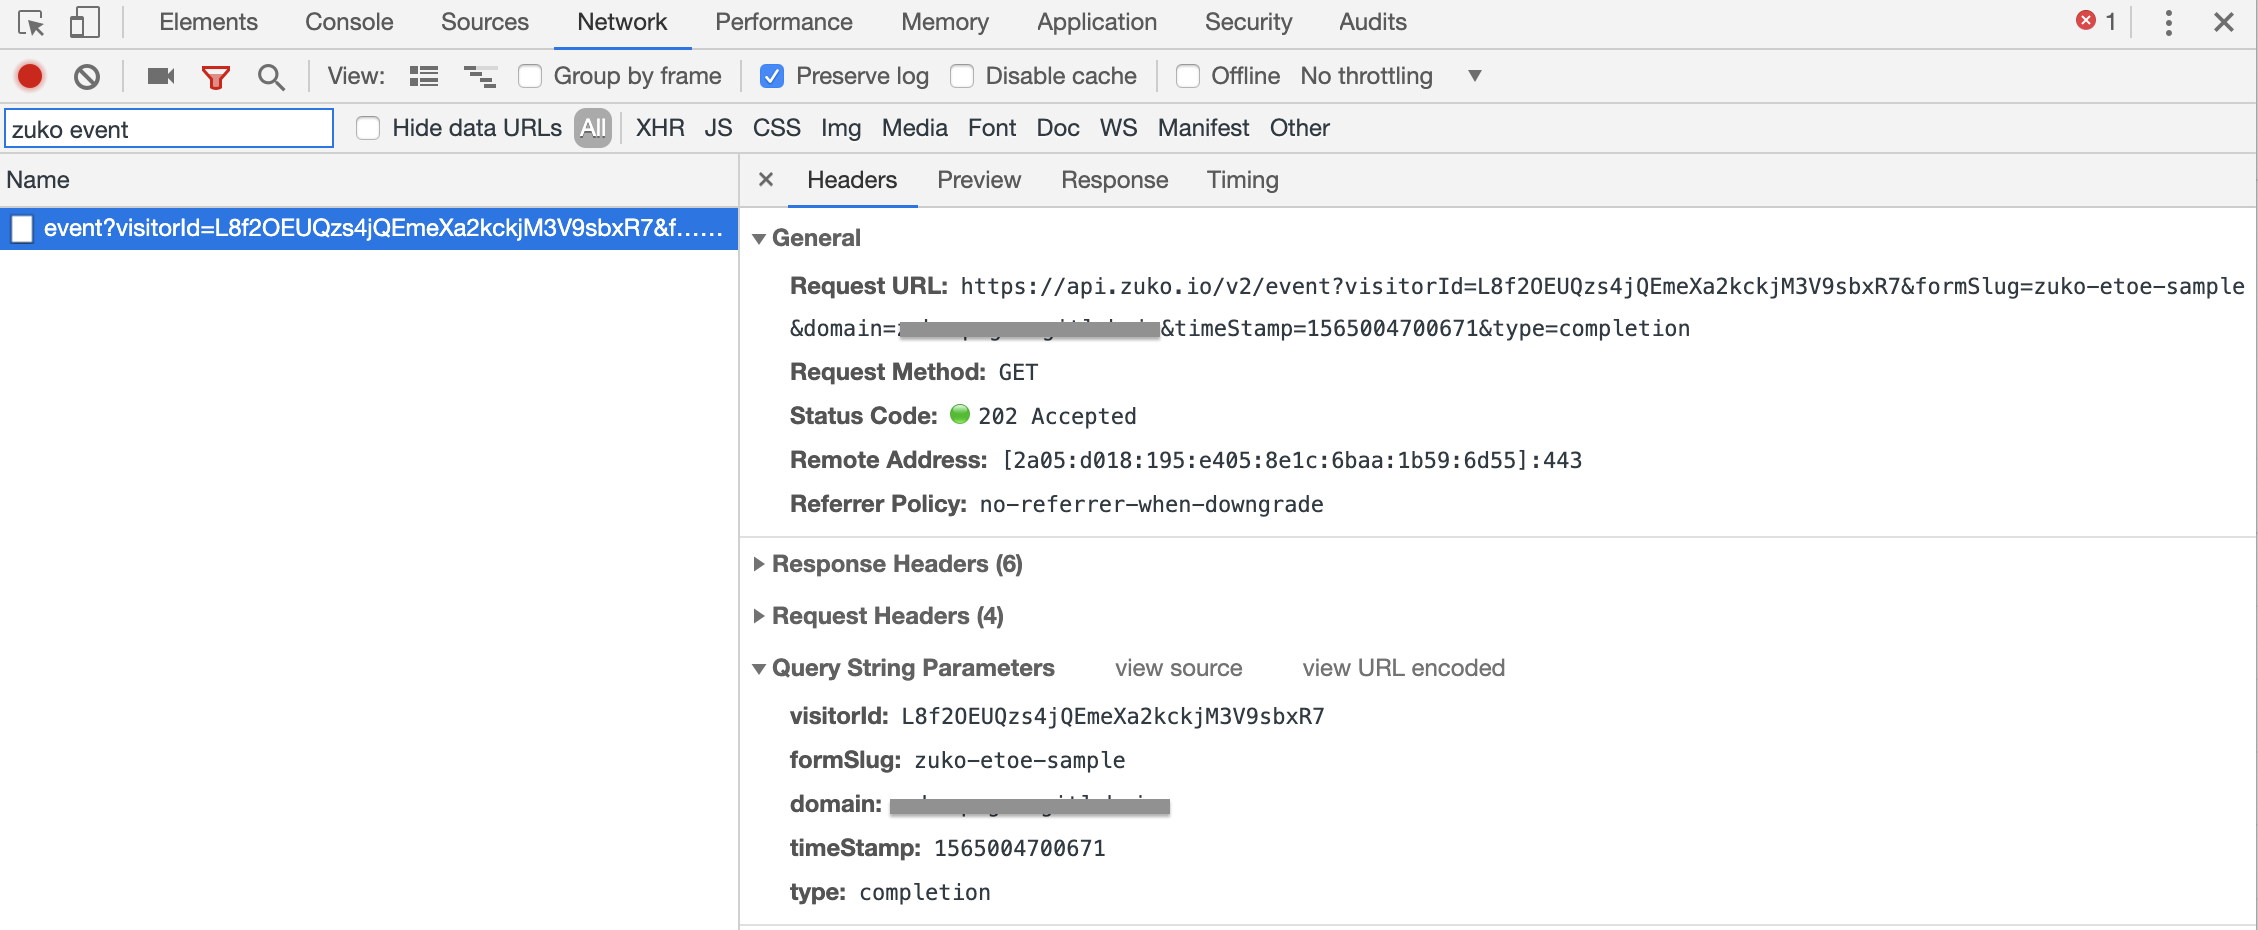
A completion event is sent to Zuko:
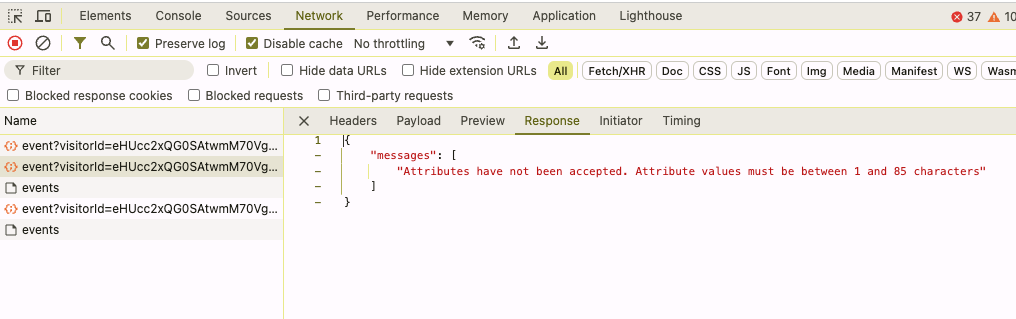
An event containing an invalid attribute is sent to Zuko - see the Response tab: